I worked in an organization that uses Salesforce CRM. Recently, we launched a new product and ran a campaign to promote it. From this campaign, we got 10000 new leads, which we stored in an Excel file.
Now, to follow up on all those leads, the sales team wants to store them in a single Salesforce lead object. Now, instead of adding them one by one, we can use the Insert Operation in Salesforce Data Loader to upload all 10000 leads from the Excel (CSV) file into Salesforce.
In this article, I will explain how to use the insert operation in Salesforce Data Loader to create multiple records at once in Salesforce objects.
Insert Operation in Salesforce Data Loader
The Insert option in Salesforce Data Loader is used to add or create new records in Salesforce. When we have data that does not exist in Salesforce, such as new Leads, Accounts, or Contacts, we use the Insert option to upload it from a file.
For example, if you ran a marketing campaign and got many new leads in an Excel file, you can use Data Loader to upload all those leads at one time. You just need to save the Excel file as a CSV file and then use the Insert option to load it into Salesforce.
In the Insert process, you select the object (such as Lead or Account), choose your CSV file, and map the file’s fields to Salesforce fields. Field mapping means telling Salesforce which column in the file should go into which field in Salesforce.
After mapping, Data Loader will insert all records from the file into Salesforce. If the data is correct, the records will be created successfully. If there is any problem, Data Loader gives you an error file so you can fix it and upload again.
How to Use the Insert Operation in Salesforce Data Loader
In the steps below, I will explain how to create new records in Salesforce from an external Excel file using the Data Loader insert operation. So users can create new records in bulk with a few clicks.
To insert lead records into Salesforce via Data Loader, ensure you have installed Data Loader in your system and have the required permission to create, update, and delete the lead records.
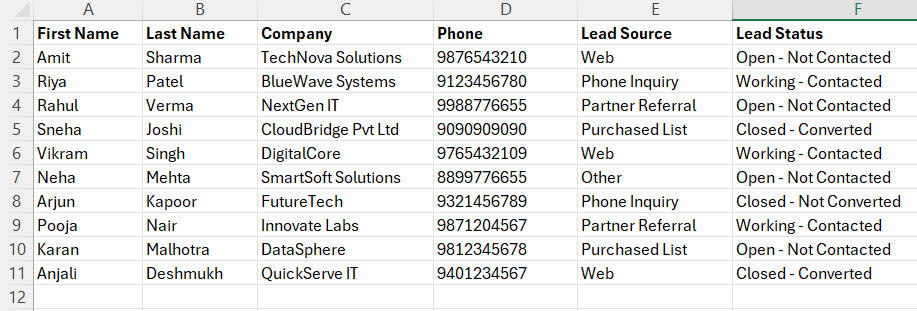
- First, we should have a CSV field with the required field columns to create a lead record in Salesforce. In the CSV file below, you can see we have some lead information with required fields in Salesforce leads.
- If your file contains a date field, then the date should be in the MM-DD-YYYY format.
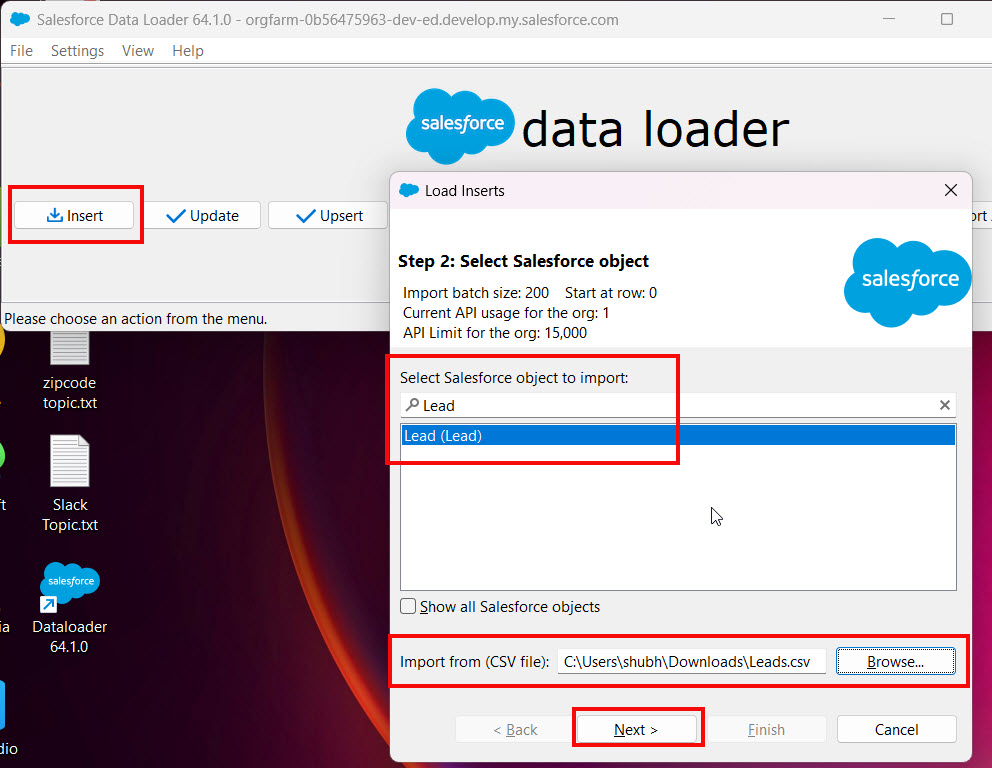
- When you open the Data Loader, you first have to select the operation you want to perform, such as Insert, Update, or Delete.
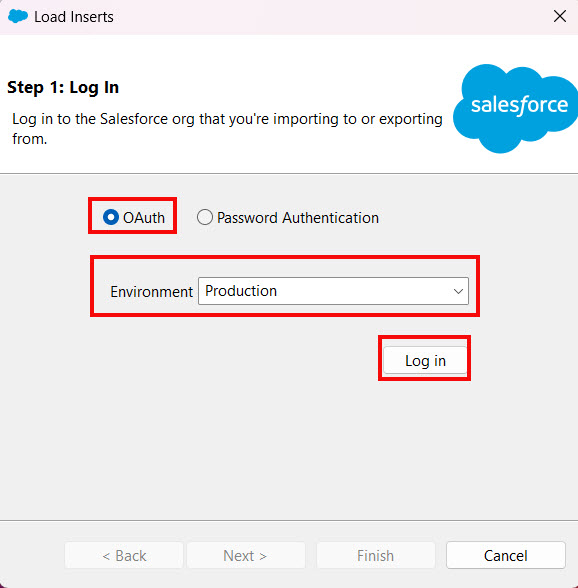
- If you have not logged in, it will prompt you to log in to Salesforce using your username, password, and security token.
- After logging in, select the Salesforce object where you want to insert the data. Here, I want to create lead records, so I have selected the Lead object.
- Next, you choose your CSV file where you have stored the records that you want to insert.
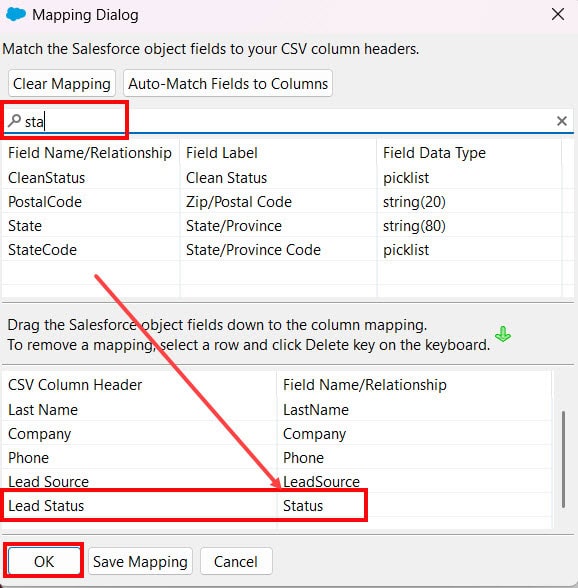
- In this step, we have to map the file fields with Salesforce fields.
- Some fields will automatically get mapped because the field names in the file match the Salesforce field names.
- But you must cross-check to make sure the correct fields are matched.
- If any fields are not matched automatically, you need to map them manually before running the upload.
- To map fields manually, click the Create or Edit a Map button.

- To map the fields that are not automatically matched, find the unmapped fields in the list and drag and drop them to the correct Salesforce fields.
- Then click the OK button. It will take you back to the previous step. After that, click the Next button to continue.
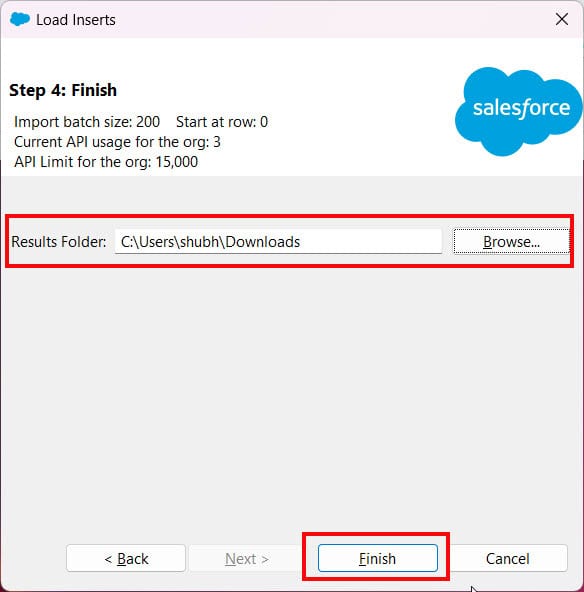
- In this step, select a folder where Data Loader will save the success file (records successfully saved in Salesforce) and the error file (records that failed to save due to errors).
- Then click the Finish button to proceed.
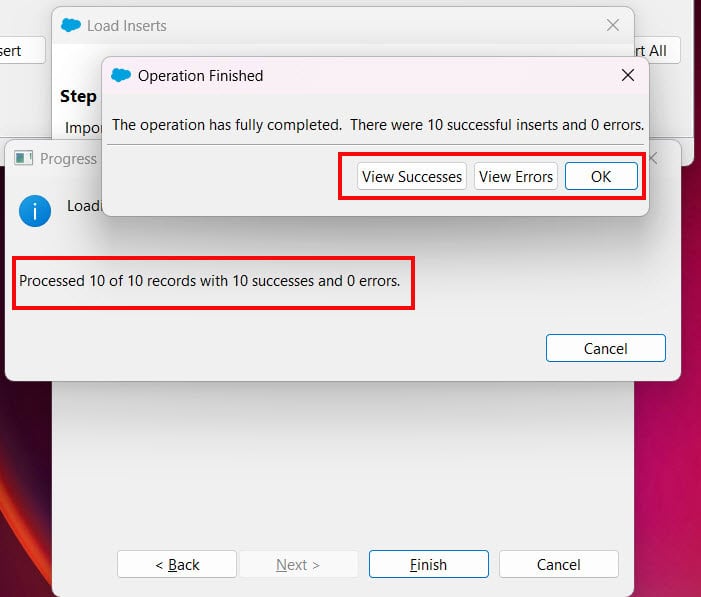
- When the upload is finished, you will see the View Success and View Error buttons. If you want to proceed, just click the OK button.
In the image below, you can see all the records that were created using the Insert operation in Salesforce Data Loader.
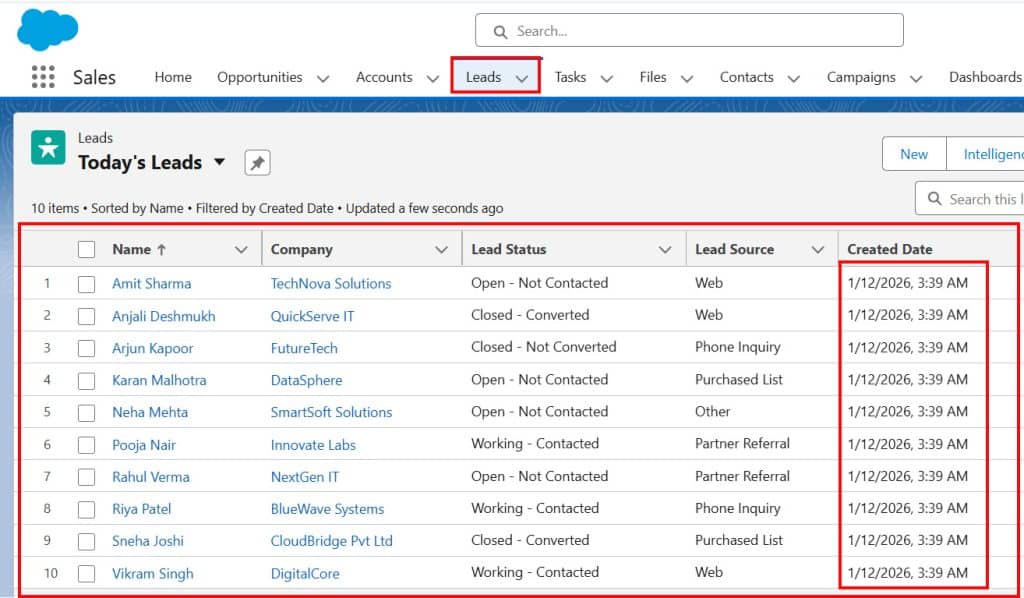
In this way, we can use the Insert operation in Salesforce Data Loader to create multiple new records from a CSV file into Salesforce at once.
Conclusion
I hope you have got a clear idea about how to use the Insert operation in Salesforce Data Loader to create multiple records at once in Salesforce objects. With this feature, users do not need to create records one by one. They can upload a large amount of data in a single process using a CSV file.
It also helps to avoid mistakes that can happen when entering data manually. By using Data Loader, you can quickly add new Leads, Accounts, Contacts, or any other Salesforce records in bulk.
You may like to read:
- Mass update Account Ownership with Data Loader in Salesforce
- Upsert Data with Data Loader in Salesforce
- Bulk Create Campaigns in Salesforce Via Data Loader
- Mass Change Email Templates Folder with Salesforce Data Loader
- Freeze or Unfreeze Multiple Users via Salesforce Data Loader

Shubham is a Certified Salesforce Developer with technical skills for Building applications using custom objects, approval processes, validation rules, Salesforce flows, and UI customization. He is proficient in writing Apex classes, triggers, controllers, Apex Batches, and bulk load APIs. I am also familiar with Visualforce Pages and Lightning Web Components. Read more about me.
