In a company, multiple employees resigned from the sales team last week. The manager does not want to delete their users immediately because their records and data are still needed.
But the company also does not want them to log in to the Salesforce org anymore. So, the Salesforce Admin decides to freeze their user accounts.
Freezing users blocks their login access, but their records remain in the system.
Instead of opening each user record one by one, the Admin uses Salesforce Data Loader to freeze all five users at once. This saves time and effort.
Later, if one employee rejoins the company, the Admin can use Data Loader again to unfreeze the user and restore login access.
In this article, we will learn how to freeze & unfreeze multiple users using the Salesforce Data Loader.
Salesforce Data Loader for User Management
In Salesforce CRM, the Data Loader is a robust and efficient tool for managing large volumes of data within Salesforce.
It supports various operations, including insert, update, upsert, delete, and hard and soft delete. Due to its ability to efficiently and accurately manage bulk data, it is better to perform freezing or unfreezing for multiple users via the data loader.
We can also perform user freezing and thawing manually, but it can take a long time when you have to manage a large number of user accounts.
How to Freeze & Unfreeze Multiple Users Using Salesforce Data Loader
Below, I will explain how to freeze & unfreeze multiple users using the Salesforce Data Loader, so you can freeze or unfreeze multiple users’ accounts at a time.
Freeze Multiple Users Using Salesforce Data Loader
To freeze user accounts in bulk via the data loader, make sure you have installed the data loader on your system and have system admin access to freeze the user accounts.
Now, follow the steps below if you meet the above conditions.
- To freeze the user account, we need to prepare a CSV file first. To do that, we will run the data export operation for the UserLogin and standard User objects.
- Now open the data loader, log in with your credentials, and run the export for the User Login data object, following the steps.
- Click Export.
- Select the data object User Login, then select the file location and click Next.
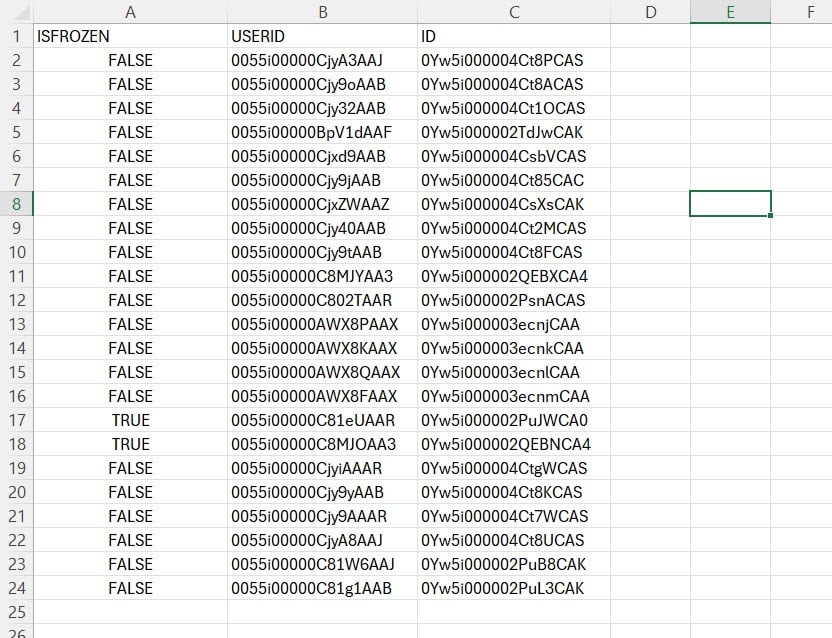
- Select the query fields Id, IsFrozen, and UserId, then click on the Finish button.
- Open the extracted data in a CSV file.
- Now open the data loader, log in with your credentials, and run the export for the User Login data object, following the steps.
- Now, following the above steps, run an export for the standard User object and select the fields Email, ID, and Name.

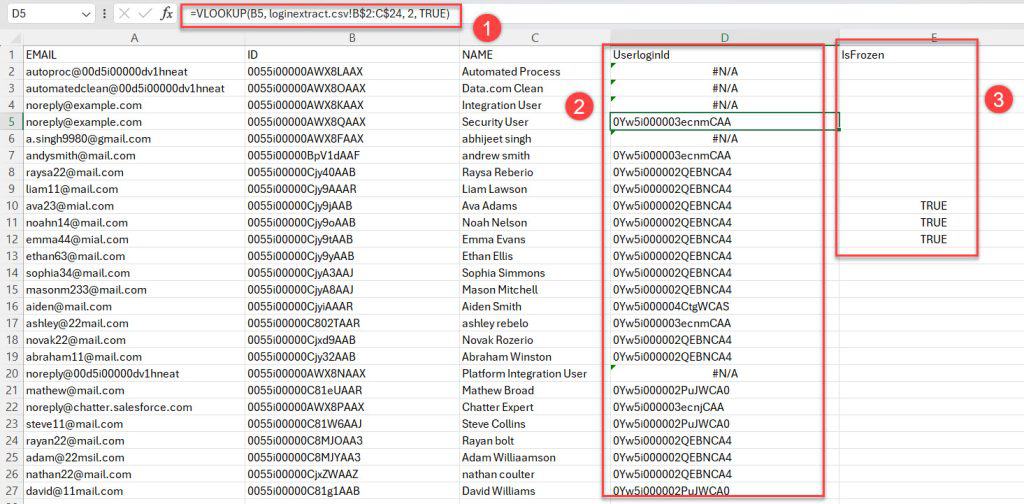
- Now, we will combine the two exported datasets using the Excel VLOOKUP function.
- In the User extract file, create a column LoginID and populate the column with the help of the Lookup formula “=VLOOKUP(B2, userloginextract.csv!B$2:C$24, 2, TRUE)“.
- After this, create a column named IsFrozen and set the value to TRUE for the user accounts you need to freeze.
- Now, except for the users’ records you need to freeze, remove the rest of the columns and save the CSV file on your system, where it can be accessed by the data loader.

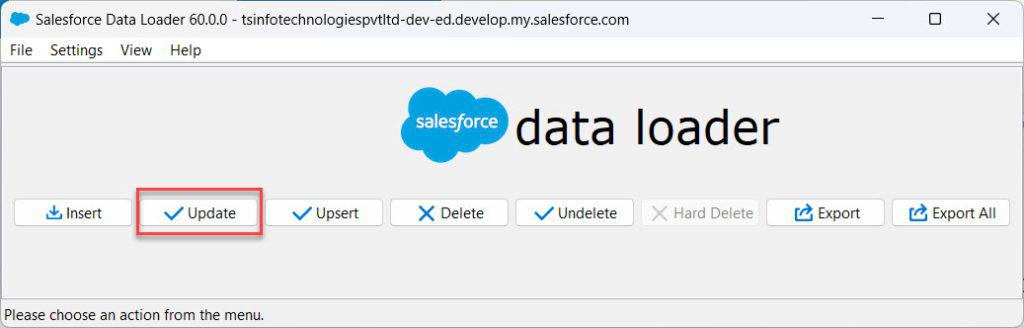
- After creating the CSV file, open the data loader and click on the Update button.
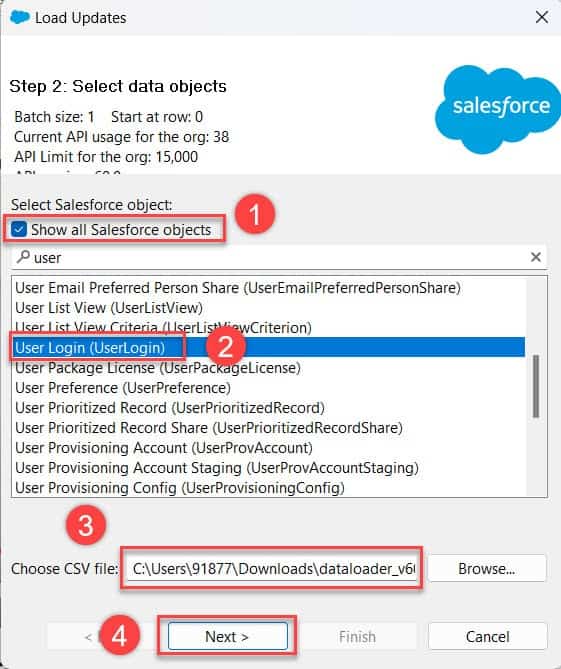
- In this step, activate the checkbox Show All Salesforce Objects, then select the data object User Login. After this, select the CSV file we created in the steps above and click Next.
- Now, the data loader will initialize the CSV file and will display the number of rows in the CSV file. Here, click on the OK button.

- Now, we will map the CSV column headers to the object field names; to do that, click the Create or Edit a Map button. Then, in the Mapping Dialog window, click on the button Auto-Match Fields to Columns.
- If the columns are not auto-matched, you have to map the object fields to the column mapping and ensure that the id field is matched with the header column UserLoginId.
- After mapping, click OK, then click Next.

- In this step, select the location for the error and success files, where they can be accessed later. At last, click on the Finish button.

- Now, we will see a warning regarding the data update. Here, click on the Yes button to proceed.

- After the data operation completes, we can see the number of successes and errors in a dialog box. Here, we got successful updates with zero errors.
- At last, click on the OK button to close the data loader.

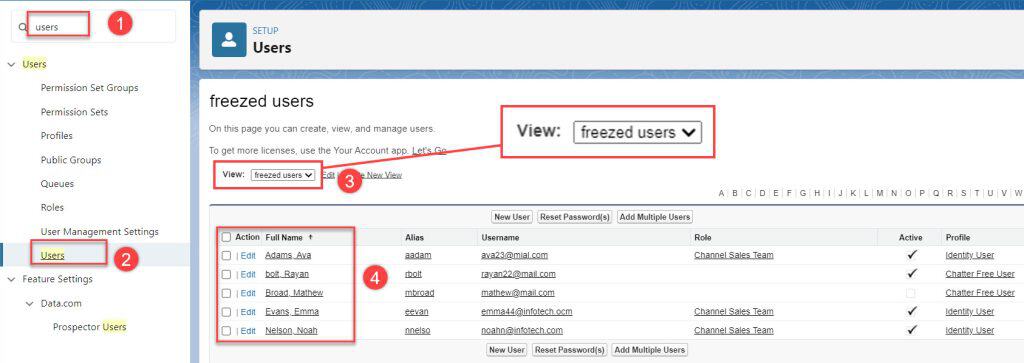
- Now, to view the freezed user accounts, open the Salesforce developer console, and from the setup page, go to the Quick Find box, search, and select Users.
- In the user setup, I created a view for freezed accounts, which shows the accounts we have freezed using the Salesforce data loader.
Now, the user accounts are successfully frozen, and we can freeze multiple users using the Salesforce data loader.
Unfreeze Multiple Users Using Salesforce Data Loader
To unfreeze multiple users via the Salesforce data loader, log in to your data loader and follow the steps below.
To unfreeze the users, we first need to run an export and use the standard User to retrieve the data for the frozen users.
- Open the Data Loader and click on the Export button.
- Select the data object User Login, select the location for the extracted file, and click on the Next button.
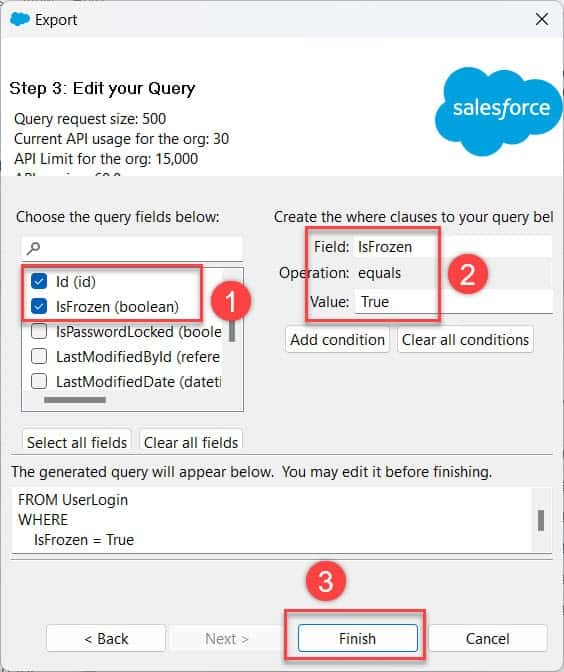
- Then select the query fields IsFrozen, Id, and UserId. Here, we will apply a filter to get only frozen accounts. To do this, enter IsFrozen in the Field and set Value to True, then click Add condition.
- At last, click on Finish.
- Now open the extracted data file in an external CSV file.

- Since we don’t have any reference to select the accounts, we will run an export for the standard User object, and, for that, follow these steps in the data loader.
- Click Export.
- Select the data object User Login, then select the file location and click Next.
- Select the query fields Email, ID, and Name, then click on the Finish button.
- Get the extracted data in a CSV file.
- Now, open the CSV file we exported the frozen user accounts (userlogin.csv), and use a VLOOKUP formula to retrieve the Names of the frozen user accounts.
- Create a header Name and enter the formula ” =VLOOKUP(C2,UserExtract.csv!$A$1:$B$27, 2, TRUE)“. After this change, set the IsFrozen status to False for the users that you want to unfreeze.

Now save the CSV file so that it can be accessed by the data loader. Till we have prepared the CSV to unfreeze, the user accounts will undergo the data update operation.
- After preparing the CSV file, open the data loader and click on the Update button.
- In this step, activate the checkbox Show all Salesforce objects, then select the User login data object. After this, select the CSV file we created, then click the Next button.

- Now, the data loader will initialize the uploaded CSV file and display the number of rows in a dialog box. Here, click on the OK button.
- Now, we will map the CSV column headers to the object field names; to do that, click the Create or Edit a Map button. Then, in the Mapping Dialog window, click onAuto-Match Fields to columns.
- Now the field names will auto-map to the header columns; if not, you have to drag the object fields into the column mapping. After this, click on the OK button, then click on the Next button.

- Now select the file locations for the error and success files, so they can be accessed later. At last, click on the Finish button.

- A warning message will appear on the screen regarding the data update. Here, click on the Yes button to proceed.

- Now, the data operation will start, and after it completes, a dialog box will display the number of successes and errors.
- In this scenario, we achieved success with zero errors, indicating that the update operation was executed successfully.
- At last, click on the OK button to close the data loader.

- Now, to view the unfreeze user accounts, open the Salesforce developer console and navigate to User Setup. In the Unfreeze Users list view, we can see the user accounts we unfroze via the data loader.

Now we can see that user accounts are successfully unfreeze the users accounts. In this way, we can unfreeze multiple users using the Salesforce data loader by following the steps above.
Conclusion
Salesforce Data Loader simplifies freezing and unfreezing multiple users, enabling administrators to manage user access efficiently across the organization.
By following the steps above, you might have understood the process of freezing and unfreezing user accounts using the Salesforce data loader. Now you can streamline user management processes and enhance the security of your Salesforce environment.
You may like to read:
- Insert or Update Price Books with Data Loader in Salesforce
- Freeze User Accounts Using Salesforce Flow
- How to Freeze and Unfreeze a User in Salesforce
- Reset a User Password in Salesforce
I am Bijay Kumar, the founder of SalesforceFAQs.com. Having over 10 years of experience working in salesforce technologies for clients across the world (Canada, Australia, United States, United Kingdom, New Zealand, etc.). I am a certified salesforce administrator and expert with experience in developing salesforce applications and projects. My goal is to make it easy for people to learn and use salesforce technologies by providing simple and easy-to-understand solutions. Check out the complete profile on About us.
